Category

diy

in diy

DIY Marble Place Card Holders

This is my first “original” DIY project. I’m still a novice in the DIY world so I started with something with a low risk of failure or injury. When they installed the marble countertops in our kitchen I made sure to ask them to save the cutouts for the sink, knowing that I might want to use it for a project some day. This project requires a few things:

  • Dremel tool with x saw
  • 12 1″x2″x1″ pieces of carrara marble
  • gold leaf paint
  • paint brush

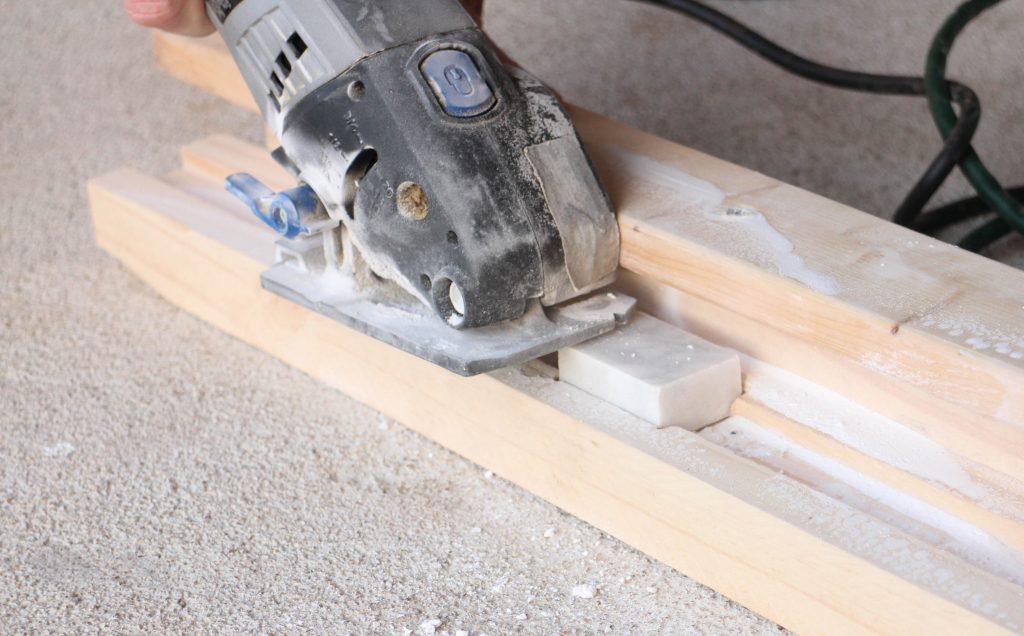
I had a larger piece of marble to start with which I had a friend cut into pieces with a tile cutter. If you don’t have access to one you might be able to go to a local fabricator. Once you have the pieces, you’ll use the dremel tool to cut a notch through the top of the marble. This will be the slot where you set your place card. Because I don’t have a fancy work table, my dad built me this little jig to keep the marble steady while I made the cut.

IMG_9622-1IMG_9627-2

That was all just the preparation. Now for the fun part. This is actually my first time working with gold leaf paint. This entire project was inspired by this Lauren Conrad project. Gold and carrara marble goes great together!
Continue reading

in diy

Clean Silver with Everyday Pantry Items

I never expected to have antique heavily tarnished silverware. But it just so happened that I acquired some from my late grandmother. Her extensive collection was seemingly gathered over a lifetime. Dozens of different designs from simple to ornate. I used this opportunity to fill some gaps in my kitchen as well as pick out some extremely unusual items, some of which that I don’t even know their real function.
Continue reading

in diy

50th Birthday Decor On A Budget

Need some decorations fast, easy, and on a budget? I did when I was asked to help out with my mother’s 50th birthday party. In this post, I will go over two very easy designs, (1) Banners and (2) DIY Photobooth.

Banners

This was amazingly easy and super cute. All you need are a few things:

  1. Cardstock – I would argue that a good book of multi-color cardstock is a must-have in any household. There are so many adorable things you can do with it and it’s inexpensive to keep around. Joann’s almost always has coupons for 40% off one item so I paid $6 for 100 pages.
  2. Letter stickers – They sell these in different sizes and a pack comes with 4-5 of every letter so it will last you through a few different occasions as long as you can creatively incorporate Q’s, Z’s, and X’s.
  3. Paper trimmer or good old fashioned scissors. The paper trimmer just saves a ton of time but not necessary.
  4. Hole punch
  5. Twine or ribbon. Jute twine is another great resource for loads of different projects. It goes with every color and gives a more rustic look and feel.

With those materials, I really don’t need to give much direction. See for yourself:

File_000 (4).jpeg
Continue reading

in diy

Extreme Makeover: KitchenAid Edition

At one time, I found the bright sunny yellow color of my KitchenAid standing mixer cute. I thought it was quirky, spunky, wacky, whimsical. Perhaps that was just a rationalization I told myself so I could get the 30% off that goes along with a discontinued color. I manufactured love for this color for quite a few years. But in my newfound DIY spirit, I took on the KitchenAid Makeover Project.

Cute isn’t exactly what I’m going for in the new house. Which is going to be done in TWO WEEKS! Classic, sophisticated, clean. Those are the words to describe the new kitchen. So the KitchenAid needed a makeover. I roughly followed the directions from Dwell Beautiful. And here follows my interpretation with the quite remarkable result!

KitchenAid.jpg

Continue reading

in diy

The best worst DIY Cheeseboard

We love to scroll through people’s blog posts, make snap one minute judgements about them, and then decide whether or not we want to like or pin them. What we don’t realize is how much time and effort might have gone into that blog post. For example, I did this just the other day when I saw a DIY Cheeseboard post on Coco + Kelley. I decided that was going to be my first DIY project. Even when gathering the materials that cost a grand total of $25 I made jokes about quitting my day job and becoming a cheeseboard artisan. Let’s just say it is a good idea that I did not do that.

$25 dollars of material

+ 8 man hours (due to my incompetence not because it should take this long)

= a product worth probably less than $10 (again due to my incompetence)

Having said that, I LOVE my cheeseboard. Mostly for the memories, the laughs, and the incredible amount of fun I had on my first real DIY project. You can find the original Coco + Kelley post here. And below you will find my personal interpretation of that post.

Continue reading